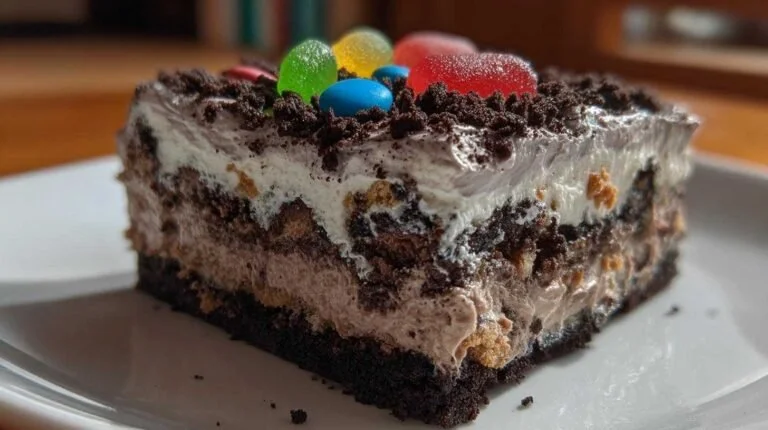
There’s something about desserts that transports you back to your childhood. For me, it’s the sweet memory of digging into a deliciously comforting Oreo Dirt Cake, a classic treat that feels like a warm hug on a rough day. Every spoonful takes me back to family gatherings and backyard barbecues, where laughter echoed around the table, and everyone was reaching for a little bit of that dark, creamy magic. We all crave those moments of joy, and this Amazing No-Bake Oreo Dirt Cake brings that back in a way that is as easy as it is fun!
Recipe Timing
- Prep Duration: 20 minutes
- Active Cooking: 10 minutes
- Total Duration: 2 hours 20 minutes (includes chilling time)
- Portion Size: Serves 8
- Complexity: Simple
Nutritional Recipe
- Calories per portion: Approximately 400
- Protein: 5 grams
- Carbs: 45 grams
- Fats: 20 grams
- Fiber: 1 gram
- Sugars: 25 grams
- Sodium: 250 mg
Why You’ll Love This Amazing No-Bake Oreo Dirt Cake
This No-Bake Oreo Dirt Cake is pure joy served in a dish! It’s rich, creamy, and has that delicious crunch of crushed Oreos that makes your taste buds do a happy dance. The beauty of this dessert lies in its simplicity—no baking required, just a few easy steps and a little chilling time. Plus, it’s a fantastic option for those warm summer days where turning on the oven feels like a chore. Who can resist that inviting layer of whipped cream and chocolate pudding topped with gummy worms? We’re diving headfirst into a nostalgic treat that’s sure to please both kids and adults alike!
The Complete Cooking Journey
Get ready to embark on a delightful journey of flavors and textures. This recipe layers creamy goodness with the crunch of Oreo cookies, creating a dessert that’s as visually appealing as it is delicious. Gather your ingredients and let’s get started!
Ingredients:
- 1 package Oreo cookies
- 8 oz cream cheese, softened
- 1 cup powdered sugar
- 2 cups whipped cream or Cool Whip
- 1 cup milk
- 1 package chocolate pudding mix
- Gummy worms (for garnish)
Method:
### Step 1: Crush the Oreo Cookies
Take your package of Oreo cookies and unleash your inner child—crush those cookies into fine crumbs and set them aside.
### Step 2: Mix the Creamy Base
In a mixing bowl, combine the softened cream cheese and powdered sugar until smooth and creamy. This is where the magic begins!
### Step 3: Fold in the Whipped Cream
Gently fold in the whipped cream until the mixture is light and airy. This step ensures your dessert has that perfect fluffy texture!
### Step 4: Prepare the Chocolate Pudding
In another bowl, prepare the chocolate pudding mix according to package instructions using the milk. This rich chocolate layer is going to be a delightful surprise!
### Step 5: Layer It Up!
In a serving dish, start layering: add a layer of crushed Oreos, followed by the cream cheese mixture, and then a generous layer of chocolate pudding. Repeat the layers until you’ve used up all your ingredients.
### Step 6: Top It Off
Sprinkle the final layer with the remaining crushed Oreos, and get ready for the fun part—garnish with cute gummy worms!
### Step 7: Chill and Serve
Refrigerate for at least 2 hours before serving to let those flavors meld together beautifully.
Serving Suggestions & Pairings
This dessert shines on its own, but it pairs wonderfully with fresh berries or a scoop of vanilla ice cream for an extra touch of deliciousness. It’s perfect for picnics, birthday parties, or just a cozy night in!
Storage & Leftovers Guide
If you somehow manage to have leftovers, store them in an airtight container in the refrigerator for up to 3 days. Just make sure to give it a good stir before serving again to bring the layers back to life.
Kitchen Wisdom & Success Tips
- Crushed Oreos can be made quickly in a food processor or by placing them in a sealed zip-lock bag and smashing them gently with a rolling pin.
- Make sure your cream cheese is softened for easy mixing—this helps achieve that smooth consistency.
- Allow plenty of time for chilling to ensure the dessert sets properly.
Flavor Variations & Adaptations
Feel free to get creative! Add crushed nuts for some crunch, swap the chocolate pudding for vanilla if you prefer a lighter taste, or throw in some peanut butter for an unexpected twist.
Reader Questions & Solutions
-
What if I can’t find Cool Whip?
You can replace it with homemade whipped cream! Just whip heavy cream with a bit of sugar until soft peaks form. -
Can I use low-fat cream cheese?
Absolutely! Just remember that it may alter the creaminess slightly. -
How do I make this gluten-free?
Use gluten-free Oreo cookies instead! -
What other toppings can I use?
Get creative with chocolate chips, sprinkles, or fresh fruit—make it your own! -
Can I freeze this dessert?
Yes, you can freeze it! Just make sure to cover it tightly. Thaw it in the fridge before serving.
Wrapping Up
This Amazing No-Bake Oreo Dirt Cake is not just a dessert; it’s a delightful experience filled with nostalgia and flavor. So, roll up your sleeves, gather your ingredients, and create some sweet memories with this easy and delicious recipe. Your loved ones will thank you for it, and trust me, this dish will quickly become a family favorite! Happy baking (or rather, mixing)!
Print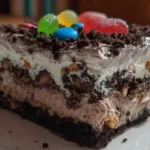
Amazing No-Bake Oreo Dirt Cake
- Total Time: 140 minutes
- Yield: 8 servings 1x
- Diet: Vegetarian
Description
A delightful no-bake dessert that combines creamy chocolate pudding and crushed Oreo cookies, perfect for any occasion.
Ingredients
- 1 package Oreo cookies
- 8 oz cream cheese, softened
- 1 cup powdered sugar
- 2 cups whipped cream or Cool Whip
- 1 cup milk
- 1 package chocolate pudding mix
- Gummy worms (for garnish)
Instructions
- Crush the Oreo cookies into fine crumbs and set aside.
- In a mixing bowl, combine softened cream cheese and powdered sugar until smooth.
- Gently fold in the whipped cream until light and airy.
- Prepare the chocolate pudding mix according to package instructions using the milk.
- In a serving dish, layer crushed Oreos, cream cheese mixture, and chocolate pudding, repeating layers until all ingredients are used.
- Top with remaining crushed Oreos and garnish with gummy worms.
- Refrigerate for at least 2 hours before serving.
Notes
For extra flavor, consider adding crushed nuts or experimenting with different pudding flavors. Store leftovers in an airtight container in the refrigerator for up to 3 days.
- Prep Time: 20 minutes
- Cook Time: 10 minutes
- Category: Dessert
- Method: No-Bake
- Cuisine: American
Nutrition
- Serving Size: 1 serving
- Calories: 400
- Sugar: 25g
- Sodium: 250mg
- Fat: 20g
- Saturated Fat: 10g
- Unsaturated Fat: 7g
- Trans Fat: 0g
- Carbohydrates: 45g
- Fiber: 1g
- Protein: 5g
- Cholesterol: 30mg