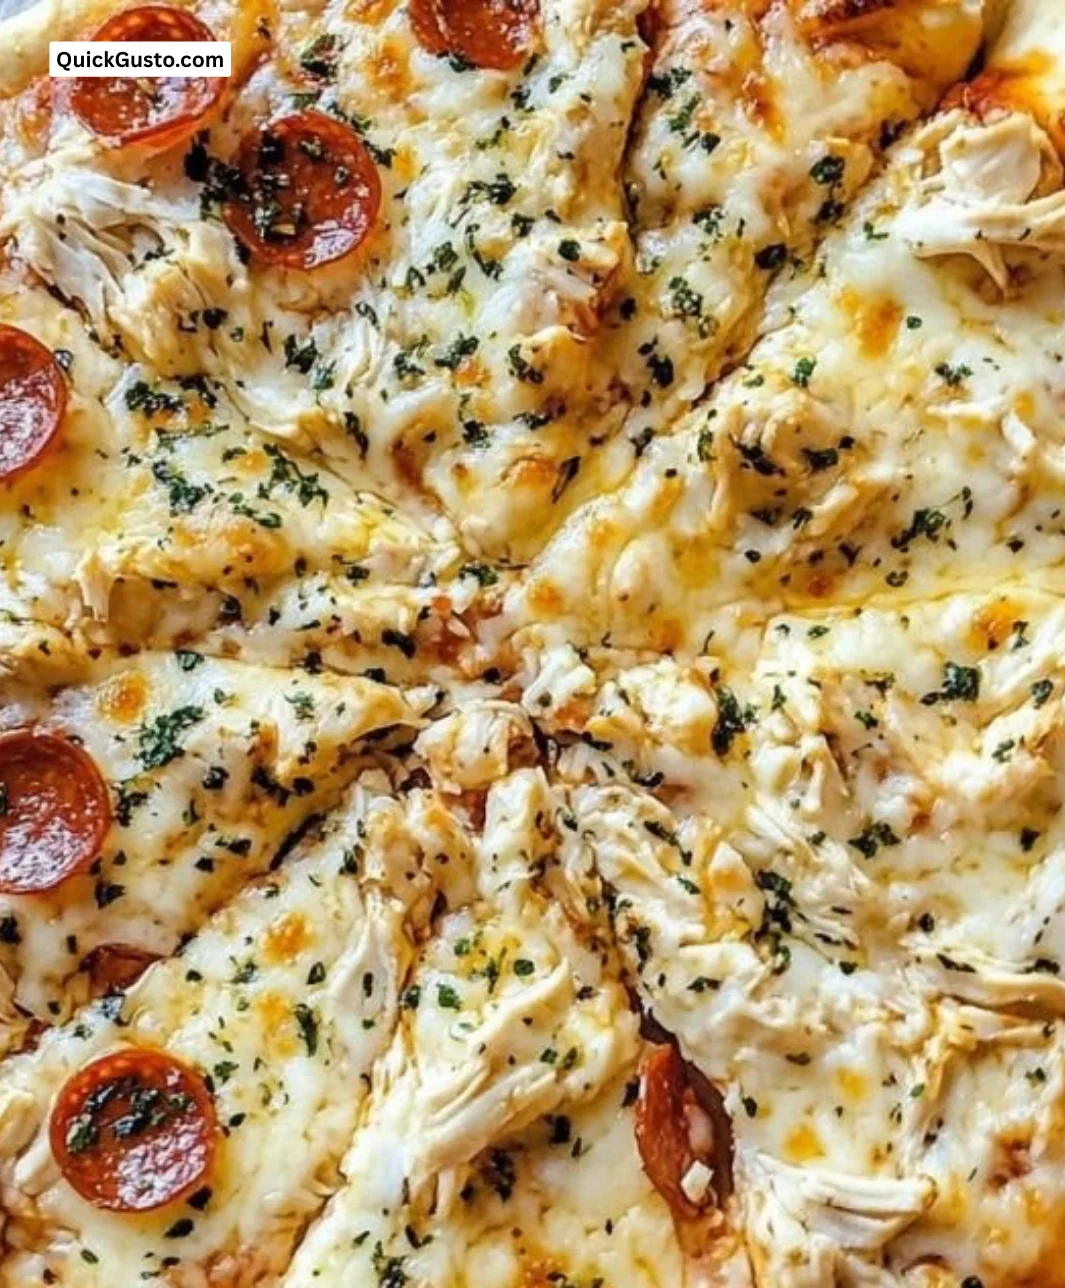
There’s something undeniably comforting about a homemade pizza, but let’s be honest—sometimes we don’t have the time or energy for yeast-proofing dough and rolling out a traditional crust. That’s where my beloved Canned Chicken Pizza Crust comes into play, turning a pantry staple into a delightful, quick, and satisfying meal. I’ll never forget the first time I whipped this up for a last-minute dinner. My kids were skeptical when I told them the “crust” was made from canned chicken, but those crispy edges and gooey toppings won them over in no time.
Recipe Timing
- Prep Duration: 5 minutes
- Active Cooking: 30-35 minutes
- Total Duration: 40 minutes
- Portion Size: Serves 4
- Complexity: Simple
Nutritional Recipe
- Calories per portion: Approximately 250
- Protein: 25 grams
- Carbs: 3 grams
- Fats: 15 grams
- Fiber: 0 grams
- Sugars: 1 gram
- Sodium: 700 mg
Why You’ll Love This Canned Chicken Pizza Crust
Why opt for a standard pizza when you can make this innovative and protein-packed alternative that pleases both your taste buds and your waistline? This Canned Chicken Pizza Crust is not just a clever use of canned goods; it’s a delicious twist on pizza that’s gluten-free, rich in protein, and customizable to fit any craving. Whether you’re in the mood for classic pepperoni or a rainbow of vegetables, this recipe is just as flexible as your favorite pizzeria but in a fraction of the time.
The Complete Cooking Journey
Join me on this simple, delightful adventure in pizza-making! With minimal ingredients and a handful of steps, you’ll create a delightful pizza experience right in your kitchen.
Ingredients:
- 1 can of chicken (drained)
- 2 large eggs
- 1 cup shredded cheese (mozzarella or cheddar)
- Salt and pepper to taste
- Optional toppings (pepperoni, vegetables, etc.)
Method:
Step 1: Preheat the Oven
Preheat your oven to 400°F (200°C) to ensure it’s hot and ready for that delicious pizza crust.
Step 2: Mix the Ingredients
In a bowl, combine the drained canned chicken, eggs, shredded cheese, salt, and pepper. Stir everything together until it’s well blended—trust me, the smell alone will have you dreaming of cheesy goodness!
Step 3: Spread the Mixture
Spread the mixture onto a greased pizza pan or baking sheet, shaping it into the form of a crust. It doesn’t have to be perfect; just make sure it’s even throughout.
Step 4: Bake the Crust
Pop that beautiful crust into the oven and bake for 15-20 minutes, or until it’s golden and crispy. The aroma wafting through your kitchen right now is pure magic!
Step 5: Add Your Toppings
Once your crust is out of the oven, it’s time for the fun part! Add your favorite toppings—be it pepperoni, a medley of colorful veggies, or a heavy drizzle of BBQ sauce. Get creative!
Step 6: Bake Again
Return the pizza to the oven and bake for an additional 10-15 minutes, until the toppings are cooked through and the crust has achieved that perfect crispiness.
Step 7: Slice and Serve
When it’s finally done, slice it up and serve warm. Enjoy that first bite; I promise you’ll feel like a kitchen superstar!
Serving Suggestions & Pairings
This pizza is delicious on its own, but I love serving it with a simple side salad or a fresh bowl of garlic bread. Pair it with your favorite soda or a glass of sparkling water infused with lemon for a refreshing touch.
Storage & Leftovers Guide
Got leftovers? No problem! Store any unused pizza in an airtight container in the fridge for up to 3 days. Just reheat in the oven or microwave when you’re ready to indulge again.
Kitchen Wisdom & Success Tips
- Use fresh chicken: If you prefer, you can use cooked fresh chicken instead of canned. Just shred it and follow the recipe as directed!
- Get creative with toppings: Don’t hesitate to experiment! Try BBQ sauce with grilled chicken or a veggie medley for a healthier option.
- Cheese variety: Feel free to mix and match cheeses! Adding a bit of parmesan can elevate the flavor.
Flavor Variations & Adaptations
- Spicy Kick: Add sliced jalapeños before baking for a spicy twist!
- Herb-Infused: Incorporate dried Italian herbs into the chicken mixture for a flavor boost.
- Veggie Lovers: Top with roasted red peppers, artichokes, or spinach for extra nutrients.
Reader Questions & Solutions
- Can I use a different protein? Absolutely! Ground turkey or shredded beef would work well too.
- What if I don’t have shredded cheese? You can cut cheese slices into small pieces or even use cream cheese for a creamier texture.
- How do I keep the crust from getting soggy? Make sure to bake the crust until it’s golden and crispy before adding your toppings to avoid moisture.
- Can I freeze the pizza? Yes! Wrap unbaked dough in plastic wrap and foil, then freeze. Bake it from frozen, adding a few extra minutes to the baking time.
- Is this gluten-free? Yes! This recipe is naturally gluten-free, perfect for those with dietary restrictions.
Wrapping Up
Cooking should never feel like a chore, and with this Canned Chicken Pizza Crust, you’ll not only save time but also impress everyone at the dinner table effortlessly. So gather your ingredients, fire up the oven, and get ready to savor a delicious homemade pizza that you can whip up in no time. Happy cooking, friends! 🍕❤️
Print
Canned Chicken Pizza Crust
- Total Time: 40 minutes
- Yield: 4 servings 1x
- Diet: Gluten-Free, High-Protein
Description
A quick and satisfying alternative to traditional pizza crust using canned chicken, perfect for families.
Ingredients
- 1 can of chicken (drained)
- 2 large eggs
- 1 cup shredded cheese (mozzarella or cheddar)
- Salt and pepper to taste
- Optional toppings (pepperoni, vegetables, etc.)
Instructions
- Preheat your oven to 400°F (200°C).
- Mix the drained canned chicken, eggs, shredded cheese, salt, and pepper in a bowl until well blended.
- Spread the mixture onto a greased pizza pan, shaping it into the form of a crust.
- Bake for 15-20 minutes, until golden and crispy.
- Add your favorite toppings.
- Bake again for 10-15 minutes, until toppings are cooked through.
- Slice and serve warm.
Notes
Use fresh chicken for a better flavor and get creative with toppings!
- Prep Time: 5 minutes
- Cook Time: 30 minutes
- Category: Main Course
- Method: Baking
- Cuisine: Italian
Nutrition
- Serving Size: 1 serving
- Calories: 250
- Sugar: 1g
- Sodium: 700mg
- Fat: 15g
- Saturated Fat: 6g
- Unsaturated Fat: 9g
- Trans Fat: 0g
- Carbohydrates: 3g
- Fiber: 0g
- Protein: 25g
- Cholesterol: 200mg