There’s something magical about the comforting blend of melted cheese and crispy bread, transcending generations of families cuddled around kitchen tables. For me, grilled cheese isn’t just a meal; it’s a warm embrace from my childhood. As a kid, my mother would whip them up in our little kitchen, the sound of sizzling bread becoming a language of comfort in our bustling home. Now, as an adult, those memories come flooding back every time I make a batch of my Mini Grilled Cheese Dippers—a delightful twist on a classic that rekindles the joyful spirit of my youth.
Imagine curling up on a chilly day, indulging in these perfectly crispy dippers while dipping them into a warm bowl of creamy tomato soup. It’s a cozy moment that warms the heart just as much as it fills the belly. With this recipe, I invite you to bring a little bit of that magic into your own home and create smiles all around the table!
Recipe Timing
- Prep Duration: 15 minutes
- Active Cooking: 10 minutes
- Total Duration: 25 minutes
- Portion Size: Serves 4 (approx. 12 dippers)
- Complexity: Simple
Nutritional Recipe
- Calories per portion: 330
- Protein: 15g
- Carbs: 33g
- Fats: 16g
- Fiber: 1g
- Sugars: 1g
- Sodium: 700mg
Why You’ll Love This Mini Grilled Cheese Dippers Recipe
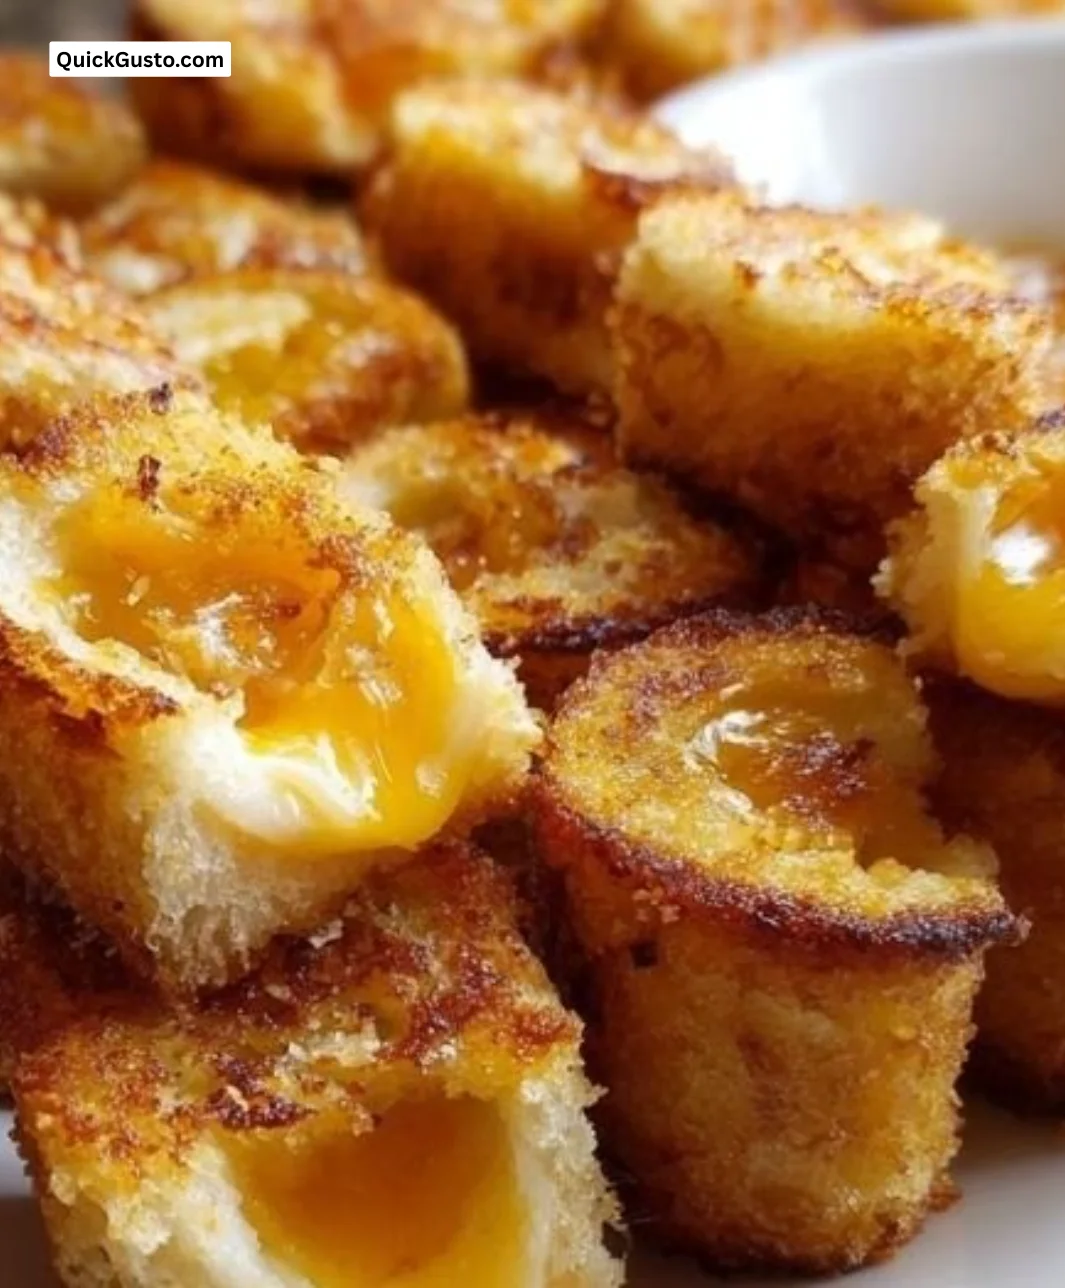
These Mini Grilled Cheese Dippers transform a beloved classic into a playful and shareable snack that’s perfect for gatherings, movie nights, or just satisfying a craving for comfort food. The combination of sharp cheddar and melty provolone creates a flavor explosion that pairs exceptionally well with the creamy tomato soup—making every bite a taste sensation. Plus, these dippers are fun to eat, adding a nostalgic twist that will take you back to simpler days.
The Complete Cooking Journey
Let’s embark on this delightful culinary adventure, from gathering ingredients to savoring the final product.
Ingredients:
- 12 slices of Sturdy White or Sourdough Bread: The choice of bread is crucial. You need a loaf that is firm enough to hold its shape when sliced and dipped without becoming soggy. A good quality sandwich bread, brioche, or a mild sourdough works wonderfully.
- 12 slices of Sharp Cheddar Cheese: Sharp cheddar provides a robust, tangy flavor that stands up beautifully to the richness of the butter and pairs perfectly with tomato soup. You can also use a combination of cheeses.
- 4 slices of Provolone or Monterey Jack Cheese: Incorporating a meltier cheese like provolone or Monterey Jack ensures you get that iconic, gooey cheese pull that makes grilled cheese so satisfying.
- 1/2 cup (1 stick) of Unsalted Butter, softened: Use good quality, unsalted butter and make sure it’s softened to room temperature. This allows you to spread it evenly across the bread, guaranteeing a perfectly golden and crispy crust without burning.
- 1 quart of Creamy Tomato Soup, for serving: While optional, serving these dippers with a warm, creamy tomato soup elevates them from a snack to a complete, comforting experience.
Method:
Step 1: Prepare the Bread
Lay out all 12 slices of bread on a large cutting board or clean work surface. Using a butter knife or spatula, generously spread the softened butter on one side of each slice of bread. Make sure to cover the entire surface, right to the edges, as this is your key to a uniformly golden-brown finish.
Step 2: Assemble the Sandwiches
Flip over 6 of the buttered bread slices so the unbuttered side is facing up. On each of these slices, place two slices of sharp cheddar cheese, followed by a slice of provolone or Monterey Jack. The layering ensures a fantastic melt and flavor profile. If the cheese slices hang over the bread, feel free to fold or trim them to fit.
Step 3: Top the Sandwiches
Place the remaining 6 slices of bread on top of the cheese-layered slices, with the buttered side facing out. You should now have 6 full-sized grilled cheese sandwiches, ready for the skillet.
Step 4: Grill the Sandwiches
Heat a large non-stick skillet or griddle over medium-low heat. It’s crucial not to have the heat too high, as the bread will burn before the cheese has a chance to melt. Place 2 or 3 sandwiches in the skillet, being careful not to overcrowd it.
Step 5: Cook to Golden Perfection
Grill the sandwiches for 3-5 minutes on the first side, or until the bread is a deep golden brown and crispy. You can gently press down on the sandwich with a spatula to encourage even cooking and help the cheese melt.
Step 6: Flip and Finish
Carefully flip the sandwiches and cook for another 3-5 minutes on the other side, until it’s equally golden brown and the cheese is completely melted and gooey. You should see it oozing slightly from the sides.
Step 7: Rest and Slice
Remove the grilled cheese sandwiches from the skillet and place them on a cutting board. Let them rest for a minute or two. This allows the cheese to set slightly, which makes for cleaner cuts.
Step 8: Create the Dippers
Using a sharp serrated knife, carefully trim the crusts off all four sides of each sandwich (this is optional but creates a more tender dipper). Then, slice each sandwich vertically into 3 or 4 equal-sized “dippers” or “sticks.”
Step 9: Serve Immediately
Arrange the mini grilled cheese dippers on a platter alongside small bowls or cups of warm tomato soup for dipping. They are best served immediately while hot and crispy.
Serving Suggestions & Pairings
For a delightful meal, serve these Mini Grilled Cheese Dippers with a side of zesty pickles or crunchy potato chips. For a refreshing touch, a simple side salad with a light vinaigrette would enhance the cozy experience. Don’t forget the warm, creamy tomato soup—it’s the ultimate pairing!
Storage & Leftovers Guide
If you happen to have leftovers (though, let’s be honest, it’s hard to resist them all in one sitting), store any uneaten dippers in an airtight container in the fridge for up to 2 days. To reheat, simply place them in a skillet over medium heat until the cheese is melted and the bread is crispy again.
Kitchen Wisdom & Success Tips
- Butter Quality: Always use high-quality unsalted butter for spreading—it makes a world of difference in flavor.
- Cheese Choices: Don’t hesitate to mix and match cheeses. Gruyere, gouda, or even a spicy pepper jack can add a delightful twist!
- Controlled Temperature: Keep the heat at a low or medium-low setting. It’s better to let it cook slower than to risk burnt bread!
Flavor Variations & Adaptations
Feel free to decorate your mini dippers with ingredients! Add a slice of fresh tomato, a sprinkle of herbs, or even a thin layer of pesto before grilling for an extra layer of flavor. For a kick, try adding a few slices of jalapeños between the cheese layers.
Reader Questions & Solutions
- Why did my cheese not melt properly? Make sure your heat is set to medium-low. If it’s too high, the bread will burn before the cheese has a chance to melt.
- Can I use whole wheat bread? Absolutely! Whole wheat bread will add a nutty flavor and nutritional benefits, although it may be a bit denser for dipping.
- What can I use instead of tomato soup? You could serve these dippers with a creamy ranch dressing or a tangy buffalo sauce for a fun twist.
- How do I keep the bread from becoming soggy? Make sure to use sturdy bread, and don’t overload the sandwiches with cheese. A good butter spread on the outside will also help maintain that perfect crunch.
- Can I freeze them? While grilled cheese dippers taste best fresh, they can be frozen before cooking. Simply freeze them in a single layer, then transfer to a container. Cook from frozen, allowing extra time for grilling.
Wrapping Up
Your journey to mastering the art of Mini Grilled Cheese Dippers is sure to bring joy and laughter to you and your loved ones. These delightful dippers are more than just food; they are a reminder of cherished moments and shared experiences. So, gather your friends and family, and dive into this cozy classic with a fun twist. Happy cooking!
Print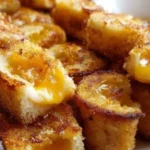
Mini Grilled Cheese Dippers
- Total Time: 25
- Yield: 4 servings 1x
- Diet: Vegetarian
Description
A delightful twist on classic grilled cheese, these Mini Grilled Cheese Dippers are perfect for dipping in creamy tomato soup.
Ingredients
- 12 slices of Sturdy White or Sourdough Bread
- 12 slices of Sharp Cheddar Cheese
- 4 slices of Provolone or Monterey Jack Cheese
- 1/2 cup (1 stick) of Unsalted Butter, softened
- 1 quart of Creamy Tomato Soup, for serving
Instructions
- Prepare the Bread: Lay out all 12 slices of bread on a large cutting board or clean work surface. Using a butter knife or spatula, generously spread the softened butter on one side of each slice.
- Assemble the Sandwiches: Flip over 6 of the buttered bread slices so the unbuttered side is facing up. On each of these slices, place two slices of sharp cheddar cheese and a slice of provolone or Monterey Jack.
- Top the Sandwiches: Place the remaining 6 slices of bread on top of the cheese-layered slices, with the buttered side facing out.
- Grill the Sandwiches: Heat a large non-stick skillet or griddle over medium-low heat and place 2 or 3 sandwiches in the skillet.
- Cook to Golden Perfection: Grill the sandwiches for 3-5 minutes on the first side until golden brown.
- Flip and Finish: Flip the sandwiches and cook for another 3-5 minutes on the other side until golden brown and the cheese is melted.
- Rest and Slice: Remove the sandwiches from the skillet and let them rest for a minute or two.
- Create the Dippers: Trim the crusts off each sandwich and slice vertically into 3 or 4 equal-sized dippers.
- Serve Immediately: Arrange the dippers on a platter with warm tomato soup for dipping.
Notes
Serve with zesty pickles or a side salad for a delightful meal.
- Prep Time: 15
- Cook Time: 10
- Category: Snack
- Method: Grilling
- Cuisine: American
Nutrition
- Serving Size: 3 dippers
- Calories: 330
- Sugar: 1g
- Sodium: 700mg
- Fat: 16g
- Saturated Fat: 9g
- Unsaturated Fat: 5g
- Trans Fat: 0g
- Carbohydrates: 33g
- Fiber: 1g
- Protein: 15g
- Cholesterol: 30mg