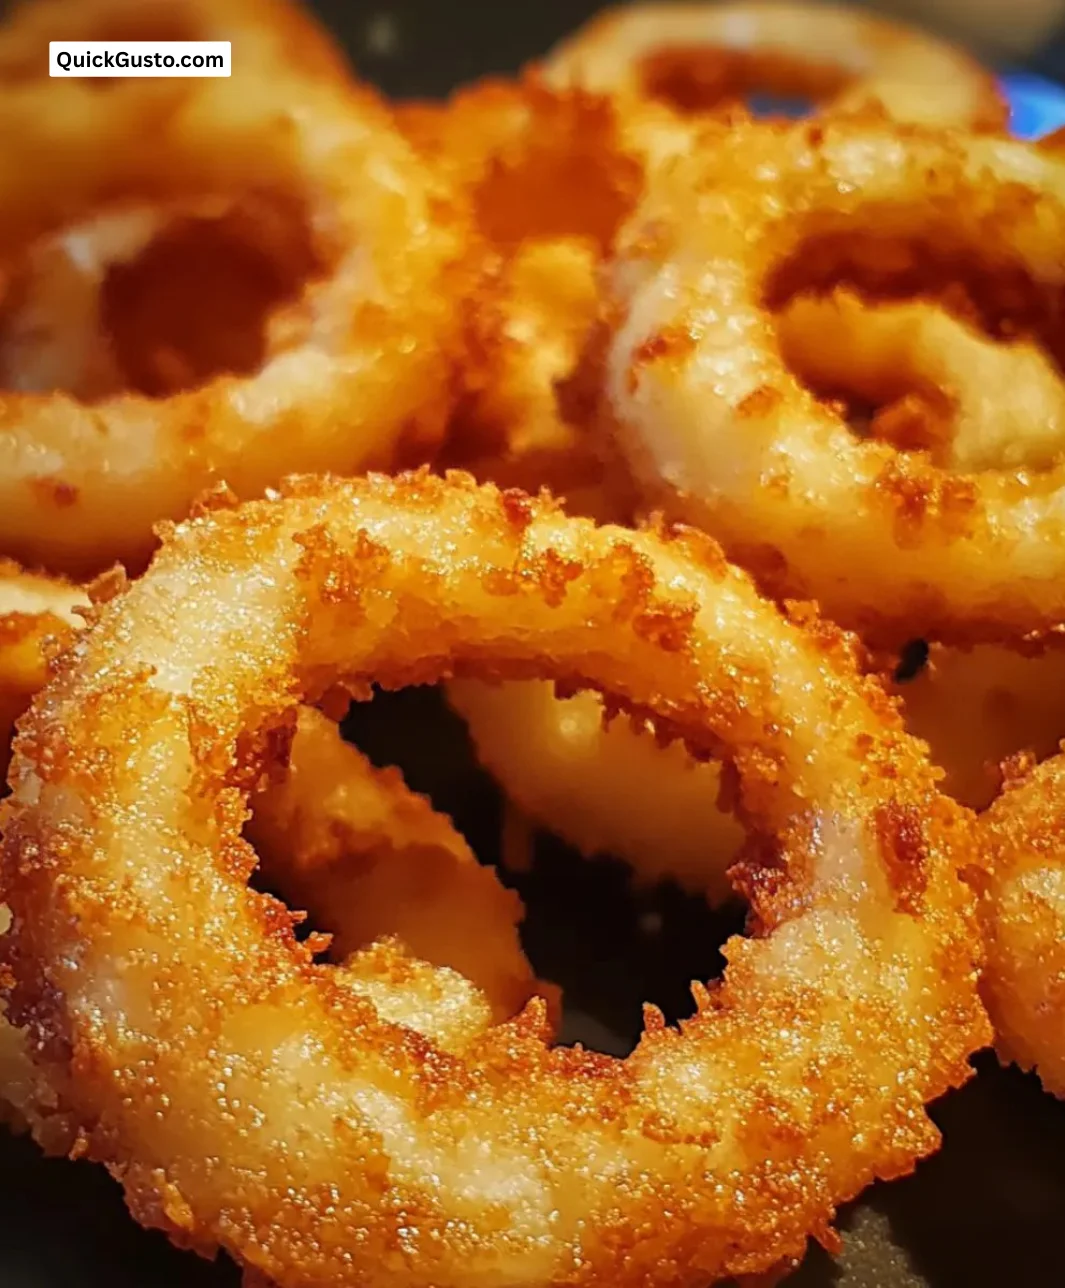
There’s something undeniably joyful about the sizzle of onion rings frying in hot oil—an echo from my childhood. Growing up, carefree summers were often highlighted by backyard barbecues, where no table was complete without a bowl of those golden, crispy delights. I remember standing around the grill, eagerly awaiting my turn to snag a piece of the first batch, the sun warming my skin while the fragrance of fried onions danced tantalizingly in the air. Fast forward to today, I still find immense joy in creating that crispy perfection at home, a whimsical nostalgia served up on a plate.
Recipe Timing
- Prep Duration: 15 minutes
- Active Cooking: 10 minutes
- Total Duration: 25 minutes
- Portion Size: Serves 4
- Complexity: Simple
Nutritional Recipe
- Calories per portion: Approximately 300
- Protein: 5g per serving
- Carbs: 38g per serving
- Fats: 15g per serving
- Fiber: 2g per serving
- Sugars: 2g per serving
- Sodium: 450mg per serving
Why You’ll Love This Irresistible Golden Crispy Onion Rings
These Irresistible Golden Crispy Onion Rings are not just a side dish; they are an experience! With a perfectly crunchy exterior and a tender, sweet onion center, every bite feels like a little indulgence. Whether served with a zesty dipping sauce or simply enjoyed as is, they can elevate any meal or gathering. You’ll love how easy they are to make and the smile they bring to anyone who takes a bite!
The Complete Cooking Journey
Let’s dive into the delightful adventure of making your homemade onion rings. With just a handful of ingredients, you’re on your way to crafting something that’s not just food, but a memory-maker. The beautiful golden hue and the satisfying crunch are calling your name, so roll up your sleeves and let’s get cooking!
Ingredients:
- 2 large onions
- 1 cup all-purpose flour
- 1 teaspoon baking powder
- 1 teaspoon paprika
- 1/2 teaspoon salt
- 1/4 teaspoon pepper
- 1 cup buttermilk
- 1 cup breadcrumbs
- Oil for frying
Method:
Step 1: Slice the Onions
Slice the onions into rings and separate them. This is the foundational step where the magic begins. Use a sharp knife for clean cuts, and don’t be afraid to admire those beautiful onion rings!
Step 2: Prepare the Dry Mixture
In a bowl, mix flour, baking powder, paprika, salt, and pepper. This blend will give our rings a deliciously seasoned crust that complements the sweetness of the onions.
Step 3: Coat with Flour
Dip onion rings into the flour mixture, ensuring they are well coated. This initial dry coat helps the buttermilk adhere better, creating a lovely layered effect.
Step 4: Soak in Buttermilk
Next, plunge those flour-coated rings into the buttermilk. This creamy dip will add moisture and flavor, creating that memorable tenderness.
Step 5: Double Coat with Flour
After soaking, dip them into the flour mixture again. This second coat is crucial—you’re on your way to crispy perfection!
Step 6: Breadcrumb Coating
Once coated, dip them into the breadcrumbs to ensure a crispy exterior. This step is where the real crunch comes in, making them irresistible!
Step 7: Heat the Oil
Heat oil in a deep pan to 350°F (175°C). A thermometer can be handy here; the right temperature ensures even frying and that golden color we’re after.
Step 8: Fry the Rings
Fry the onion rings in batches until golden brown, about 2-3 minutes. The sizzling sound and tantalizing aroma will have everyone gathering!
Step 9: Drain and Serve
Drain on paper towels and serve hot. Grab your favorite dipping sauce, or enjoy them plain—the choice is yours!
Serving Suggestions & Pairings
These golden beauties pair wonderfully with a tangy ranch or zesty barbecue sauce. For a complete meal, serve them alongside burgers, fried chicken, or a fresh garden salad. They also make a fantastic snack while watching the game!
Storage & Leftovers Guide
To store leftovers, place the onion rings in an airtight container in the fridge for up to 2 days. They can be reheated in the oven at 350°F (175°C) for about 10 minutes to regain some of that crispy texture.
Kitchen Wisdom & Success Tips
- Make sure your oil is hot enough before adding the rings; this prevents them from getting soggy.
- Don’t overcrowd the pan; fry in batches for an even golden color.
- If you’re looking for a healthier version, consider baking them at 425°F (220°C) for about 20 minutes, flipping halfway through.
Flavor Variations & Adaptations
Try experimenting with spices! Add garlic powder, cayenne for heat, or parmesan cheese to the breadcrumbs for an extra flavor punch. You can even swap out buttermilk for a dairy-free alternative like unsweetened almond milk.
Reader Questions & Solutions
-
Can I make these onion rings ahead of time?
Yes! You can prepare them up to the freezing stage. Just freeze after coating and then fry directly from frozen when you’re ready to eat. -
My onion rings turned out greasy. What went wrong?
This usually means the oil wasn’t hot enough. Make sure to monitor the temperature before frying! -
What can I use instead of buttermilk?
You can substitute with regular milk mixed with a tablespoon of vinegar or lemon juice to create a similar acidity. -
How do I get the rings to stay crispy for longer?
Consider serving them on a cooling rack over a baking sheet instead of paper towels; this helps prevent steam from making them soggy. -
Can I make these gluten-free?
Absolutely! Use almond flour or a gluten-free all-purpose flour blend for the coating.
Wrapping Up
There it is—your guide to crafting irresistibly crispy onion rings that can transport you back to those joyful days of summer barbecues. Remember, cooking is about happiness and creating memories, so invite friends and family to join in on this delicious experience. So fire up that frying pan, and let those onion rings serve you a taste of nostalgia and joy. Happy cooking! 🌟
Print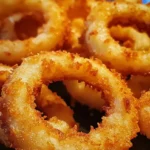
Irresistible Golden Crispy Onion Rings
- Total Time: 25 minutes
- Yield: 4 servings 1x
- Diet: Vegetarian
Description
These Golden Crispy Onion Rings are a nostalgic treat with a crunchy exterior and sweet onion center, perfect for any barbecue or gathering.
Ingredients
- 2 large onions
- 1 cup all-purpose flour
- 1 teaspoon baking powder
- 1 teaspoon paprika
- 1/2 teaspoon salt
- 1/4 teaspoon pepper
- 1 cup buttermilk
- 1 cup breadcrumbs
- Oil for frying
Instructions
- Slice the onions into rings and separate them.
- In a bowl, mix flour, baking powder, paprika, salt, and pepper.
- Dip onion rings into the flour mixture, ensuring they are well coated.
- Plunge the flour-coated rings into the buttermilk.
- Dip them into the flour mixture again for a second coat.
- Once coated, dip them into the breadcrumbs.
- Heat oil in a deep pan to 350°F (175°C).
- Fry the onion rings in batches until golden brown, about 2-3 minutes.
- Drain on paper towels and serve hot.
Notes
Make sure the oil is hot enough to avoid soggy rings. Fry in batches for even cooking.
- Prep Time: 15 minutes
- Cook Time: 10 minutes
- Category: Appetizer
- Method: Frying
- Cuisine: American
Nutrition
- Serving Size: 1 serving
- Calories: 300
- Sugar: 2g
- Sodium: 450mg
- Fat: 15g
- Saturated Fat: 2g
- Unsaturated Fat: 8g
- Trans Fat: 0g
- Carbohydrates: 38g
- Fiber: 2g
- Protein: 5g
- Cholesterol: 0mg