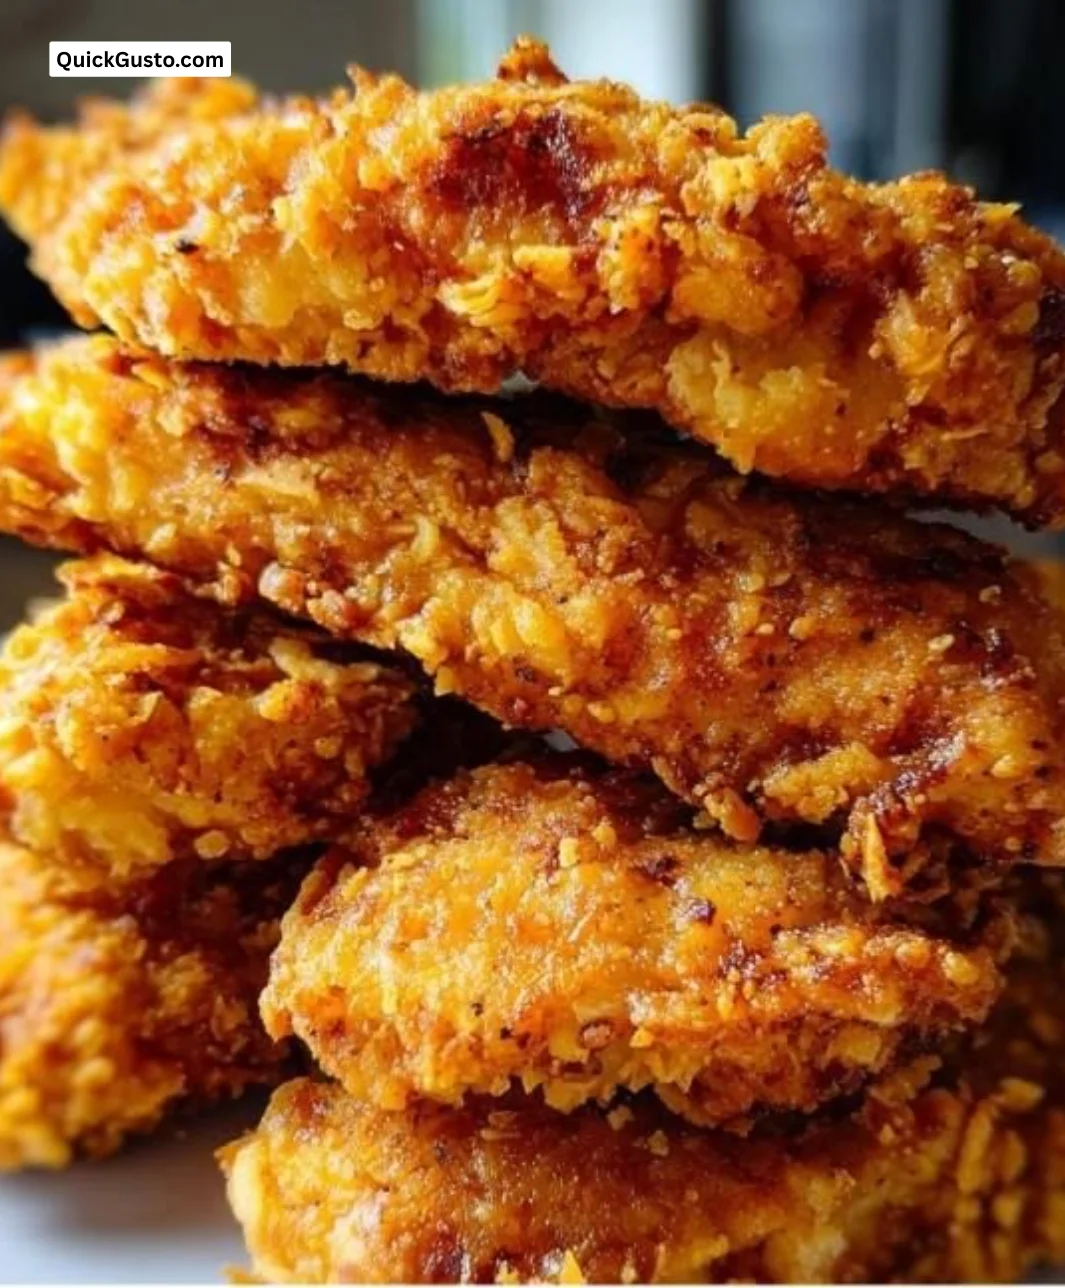
Life has a wonderful way of wrapping itself around food, embracing us in moments that linger long after the last bite. I still remember the first time I fried chicken tenders in my tiny kitchen, a space filled with both frivolous dreams and flour dust. My little ones would bounce with excitement, their eyes wide in anticipation—the air filled with undeniable magic as soon as the tenders hit the hot oil. Crispy on the outside, juicy on the inside, they instantly vanished from plates, and peace returned only when the last crumb was wiped away. It’s no wonder these Crispy Chicken Tenders became a family staple—a dish that holds the promise of laughter, good times, and unmistakable comfort that makes any day feel like a celebration.
Recipe Timing
- Prep Duration: 15 minutes
- Active Cooking: 10 minutes
- Total Duration: 25 minutes
- Portion Size: Serves 4
- Complexity: Simple
Nutritional Recipe
- Calories per portion: 300
- Protein: 24g
- Carbs: 30g
- Fats: 12g
- Fiber: 1g
- Sugars: 1g
- Sodium: 400mg
Why You’ll Love This Crispy Chicken Tenders
There are few things that rival the joy of biting into a perfectly crispy chicken tender. It’s an experience that transcends age—children love them, adults adore them, and they fit easily into almost any meal. These tenders are versatile; they’re right at home on a dinner plate, tucked into a sandwich, or served as the centerpiece of a casual party spread. Whether you’re dipping them in classic barbecue sauce, ranch, or a spicy aioli, every bite bursts with flavor and texture that feels like a warm hug on a plate. Plus, making them from scratch means you get to control every aspect, from seasoning to crunchiness, ensuring they’re just how you like them.
The Complete Cooking Journey
Creating these Crispy Chicken Tenders is not just cooking; it’s an adventure in the kitchen! The process begins with the humble act of prepping—gathering ingredients that come together like good friends at a gathering. Then, as the oil heats up, anticipation builds. You’ll bask in the satisfying rhythm of dipping and breading, watching as your tenders transform before your eyes. Finally, the reward: the heavenly aroma that fills your home as they fry to golden perfection. Get ready to savor the journey as much as the destination!
Ingredients:
- 1 lb chicken tenderloins
- 1 cup all-purpose flour
- 2 eggs
- 1 cup breadcrumbs
- 1 tsp salt
- 1 tsp pepper
- 1 tsp paprika
- Oil for frying
Method:
Step 1: Heat Up Your Oil
Begin by heating oil in a large skillet over medium-high heat. You’ll want enough oil to cover the bottom of the pan, about ½ inch deep, so those tenders fry beautifully and turn a perfect golden brown.
Step 2: Set Up Your Breading Station
Set up a breading station with three bowls: one filled with flour, the second with beaten eggs, and the third filled with breadcrumbs mixed with salt, pepper, and paprika. This step is delightful in itself—watch those vibrant spices cascade into the breadcrumbs like colorful confetti!
Step 3: Breading the Chicken
Dip each chicken tenderloin first into the flour, shaking off the excess. Next, let it bask in the egg wash, covering every inch, and finally, meticulously coat it in the breadcrumb mixture. Remember, the more breadcrumbs that cling, the crispier your tenders will be!
Step 4: Frying the Tenders
Carefully place the coated tenders into the hot oil. Fry until golden brown on both sides, about 4-5 minutes each. You’ll hear them sizzle as they cook—an audibly delightful sign that things are going well.
Step 5: Drain and Serve
Remove the tenders from the oil and place them on paper towels to drain excess oil. Serve hot with your favorite dipping sauce—each tender practically begging to be savored.
Serving Suggestions & Pairings
These crispy tenders shine brightest when served with an array of dipping sauces. Think honey mustard, barbecue, ranch, or even a homemade spicy sriracha mayo. Pair them with a fresh side salad or crispy fries for a complete meal. For a fun dinner idea, turn them into sliders by placing them in mini buns with lettuce and your preferred sauce.
Storage & Leftovers Guide
Leftover chicken tenders can last in the fridge for up to three days. To preserve their crunch, reheat them in an oven at 375°F for about 10 minutes, or until warmed through. Avoid microwaving them, as they’ll lose their crispy texture. If you want to freeze them, allow them to cool completely, then wrap them tightly in foil or freezer bags. They’ll be good for up to three months.
Kitchen Wisdom & Success Tips
- Make Sure the Oil is Hot: Test the oil by dropping in a breadcrumb; it should sizzle upon contact.
- Don’t Crow the Pan: Fry in batches for even cooking; overcrowding leads to steaming rather than frying.
- Let Excess Oil Drain: Be sure to place fried tenders on paper towels to absorb excess oil for a cleaner finish.
Flavor Variations & Adaptations
Feel free to experiment with your breadcrumb coating! Add grated Parmesan cheese for a nutty flavor, or toss in some garlic powder for extra zest. For a spicy kick, mix crushed red pepper flakes into your breadcrumbs or swap out the paprika for cayenne. You can also try gluten-free breadcrumbs or almond flour for a healthier twist.
Reader Questions & Solutions
-
How do I make these tenders extra crispy?
Use panko breadcrumbs for a crunchier texture. -
Can I bake these instead of frying?
Yes! Place breaded tenders on a baking sheet, spray lightly with cooking spray, and bake at 425°F for about 20 minutes, flipping halfway. -
What can I use instead of chicken tenderloins?
Chicken breasts cut into strips work wonderfully as well. -
How do I keep the breading from falling off?
Ensure the chicken is dry before breading, and press the breadcrumbs firmly onto the chicken to help them stick better. -
What’s a good dipping sauce idea?
A homemade honey mustard can elevate these tenders—mix equal parts honey and Dijon mustard for a perfect sweet kick.
Wrapping Up
Cooking should be a joyful exploration, and these Crispy Chicken Tenders are just the beginning! They remind us that great food can be simple yet profoundly satisfying. So, gather your ingredients, fire up that stovetop, and create a dish that not only feeds the body but also nourishes the soul. Keep spreading the love through your cooking, and remember, happiness is best served crispy!
Print
Crispy Chicken Tenders
- Total Time: 25 minutes
- Yield: 4 servings 1x
- Diet: None
Description
Juicy chicken tenders fried to golden perfection, perfect for any occasion.
Ingredients
- 1 lb chicken tenderloins
- 1 cup all-purpose flour
- 2 eggs
- 1 cup breadcrumbs
- 1 tsp salt
- 1 tsp pepper
- 1 tsp paprika
- Oil for frying
Instructions
- Heat your oil in a large skillet over medium-high heat, about ½ inch deep.
- Set up a breading station with three bowls: flour, beaten eggs, and breadcrumbs mixed with salt, pepper, and paprika.
- Dip each chicken tenderloin into the flour, egg wash, then coat in breadcrumbs.
- Carefully place the tenders into the hot oil and fry until golden brown, about 4-5 minutes each side.
- Remove the tenders from the oil and drain on paper towels. Serve hot with your favorite dipping sauce.
Notes
For extra crispy tenders, use panko breadcrumbs and avoid overcrowding the pan while frying.
- Prep Time: 15 minutes
- Cook Time: 10 minutes
- Category: Main Course
- Method: Frying
- Cuisine: American
Nutrition
- Serving Size: 1 serving
- Calories: 300
- Sugar: 1g
- Sodium: 400mg
- Fat: 12g
- Saturated Fat: 2g
- Unsaturated Fat: 8g
- Trans Fat: 0g
- Carbohydrates: 30g
- Fiber: 1g
- Protein: 24g
- Cholesterol: 0mg